
How to Make an Android App in a Few Days, Part 3: Writing the Code
Step 1: Understanding Code Crash Course
In this article, I will only teach you what’s absolutely necessary to know about coding. After all, we want to get this app done ASAP.
In programming, we have classes and functions. Think of classes as nouns and functions as verbs: classes are something, functions do something. Remember, Kotlin is the language we’re using. In Kotlin, classes are created like this:
class MyClass {
    //some content...
}
Functions are created like this:
fun doSomething() {
}
MainActivity is a class, and in fact, it will be the only class we need: ‘MainActivity’ will be the screen for our app. The onCreate function defines what happens when our MainActivity is created: We’re basically saying what do we want to do once our screen is shown to the user?
What we want to do is be able to add two numbers together. For that, we’ll create a function that looks like this:
fun add(x: Double, y: Double) : Double = x + yDouble is the programming term for a decimal number, e.g. 2.3 is a Double.
If you’ve done math or programming before, this might seem familiar to you and if not, that’s fine as well! Let’s dissect this.

What does all this mean? It’s actually very simple:
Our function’s name is “add”.
It takes two parameters (x and y), both of which are decimal numbers (Doubles).
When it’s given two Doubles, a different Double is returned (this is the two numbers added together).
What the function actually does is return x + y.
So, we can summarize this as:
When given two Doubles (decimal numbers), the “add” function takes those two numbers and returns the addition of those two numbers.
It is imperative that you look at this sentence as exactly the same as the code above: they are completely equivalent, and the most important thing to remember is that coding is much easier when you think of it as English sentences.
Here are some examples of this function in action:
add(2, 2) = 4
add(3.5, 6) = 9.5
add(
  -1,
  4.6
) = 3.6
As you can see in the last example, it works on multiple lines as well, doesn’t have to be on one line.
If you haven’t quite wrapped your head around the function, feel free to take some time to look at it. If it makes sense, then we can go ahead and add it to our code, like this:

Step 2: Adding the numbers together when the button is clicked
The next step is to make our button actually do something: that is, to add the two numbers together!
To do that, we will have this function:
addButton.setOnClickListener {
            resultText.text = add(
                    firstNumberInput.text.toString().toDouble(),
                    secondNumberInput.text.toString().toDouble()
            ).toString()
        }
Hold up! What the hell is all that? Like most things in programming, it’s actually much easier than it looks and makes much more sense when you translate it into plain English. What are those .toString() and .toDouble() things, you may ask? While we will definitely need to have these in the code when all is said and done, it’s not so important to the core meaning of the function, so let’s take those out while we figure out what’s going on here:
addButton.setOnClickListener {
            resultText.text = add(
                    firstNumberInput.text,
                    secondNumberInput.text
            }
        }
This already looks much less cluttered than what we had before. Now, let’s simplify this even more. There are two components to what we’re looking at. The first component is this:
addButton.setOnClickListener {
            ...
        }
You may remember that when we were making our UI, we renamed the IDs in our layout to something more memorable, and this is why: addButton is the ID of our button in the layout. And what do we want to do? We want our button to do something when it’s clicked, and that’s exactly what setOnClickListener does. If we translate this to English:
We are declaring that whenever addButton is clicked, we want … to happen.
The second part is this snippet:
resultText.text = add(
    firstNumberInput.text,
    secondNumberInput.text
)
resultText is the ID of the text component in our UI layout, where the result of the addition will be shown. firstNumberInput and secondNumberInput are the two inputs where the user can put some numbers into. The add function is what we created in the previous step. If we translate this into English:
The text of resultText should be the addition of whatever numbers are in firstNumberInput and secondNumberInput.
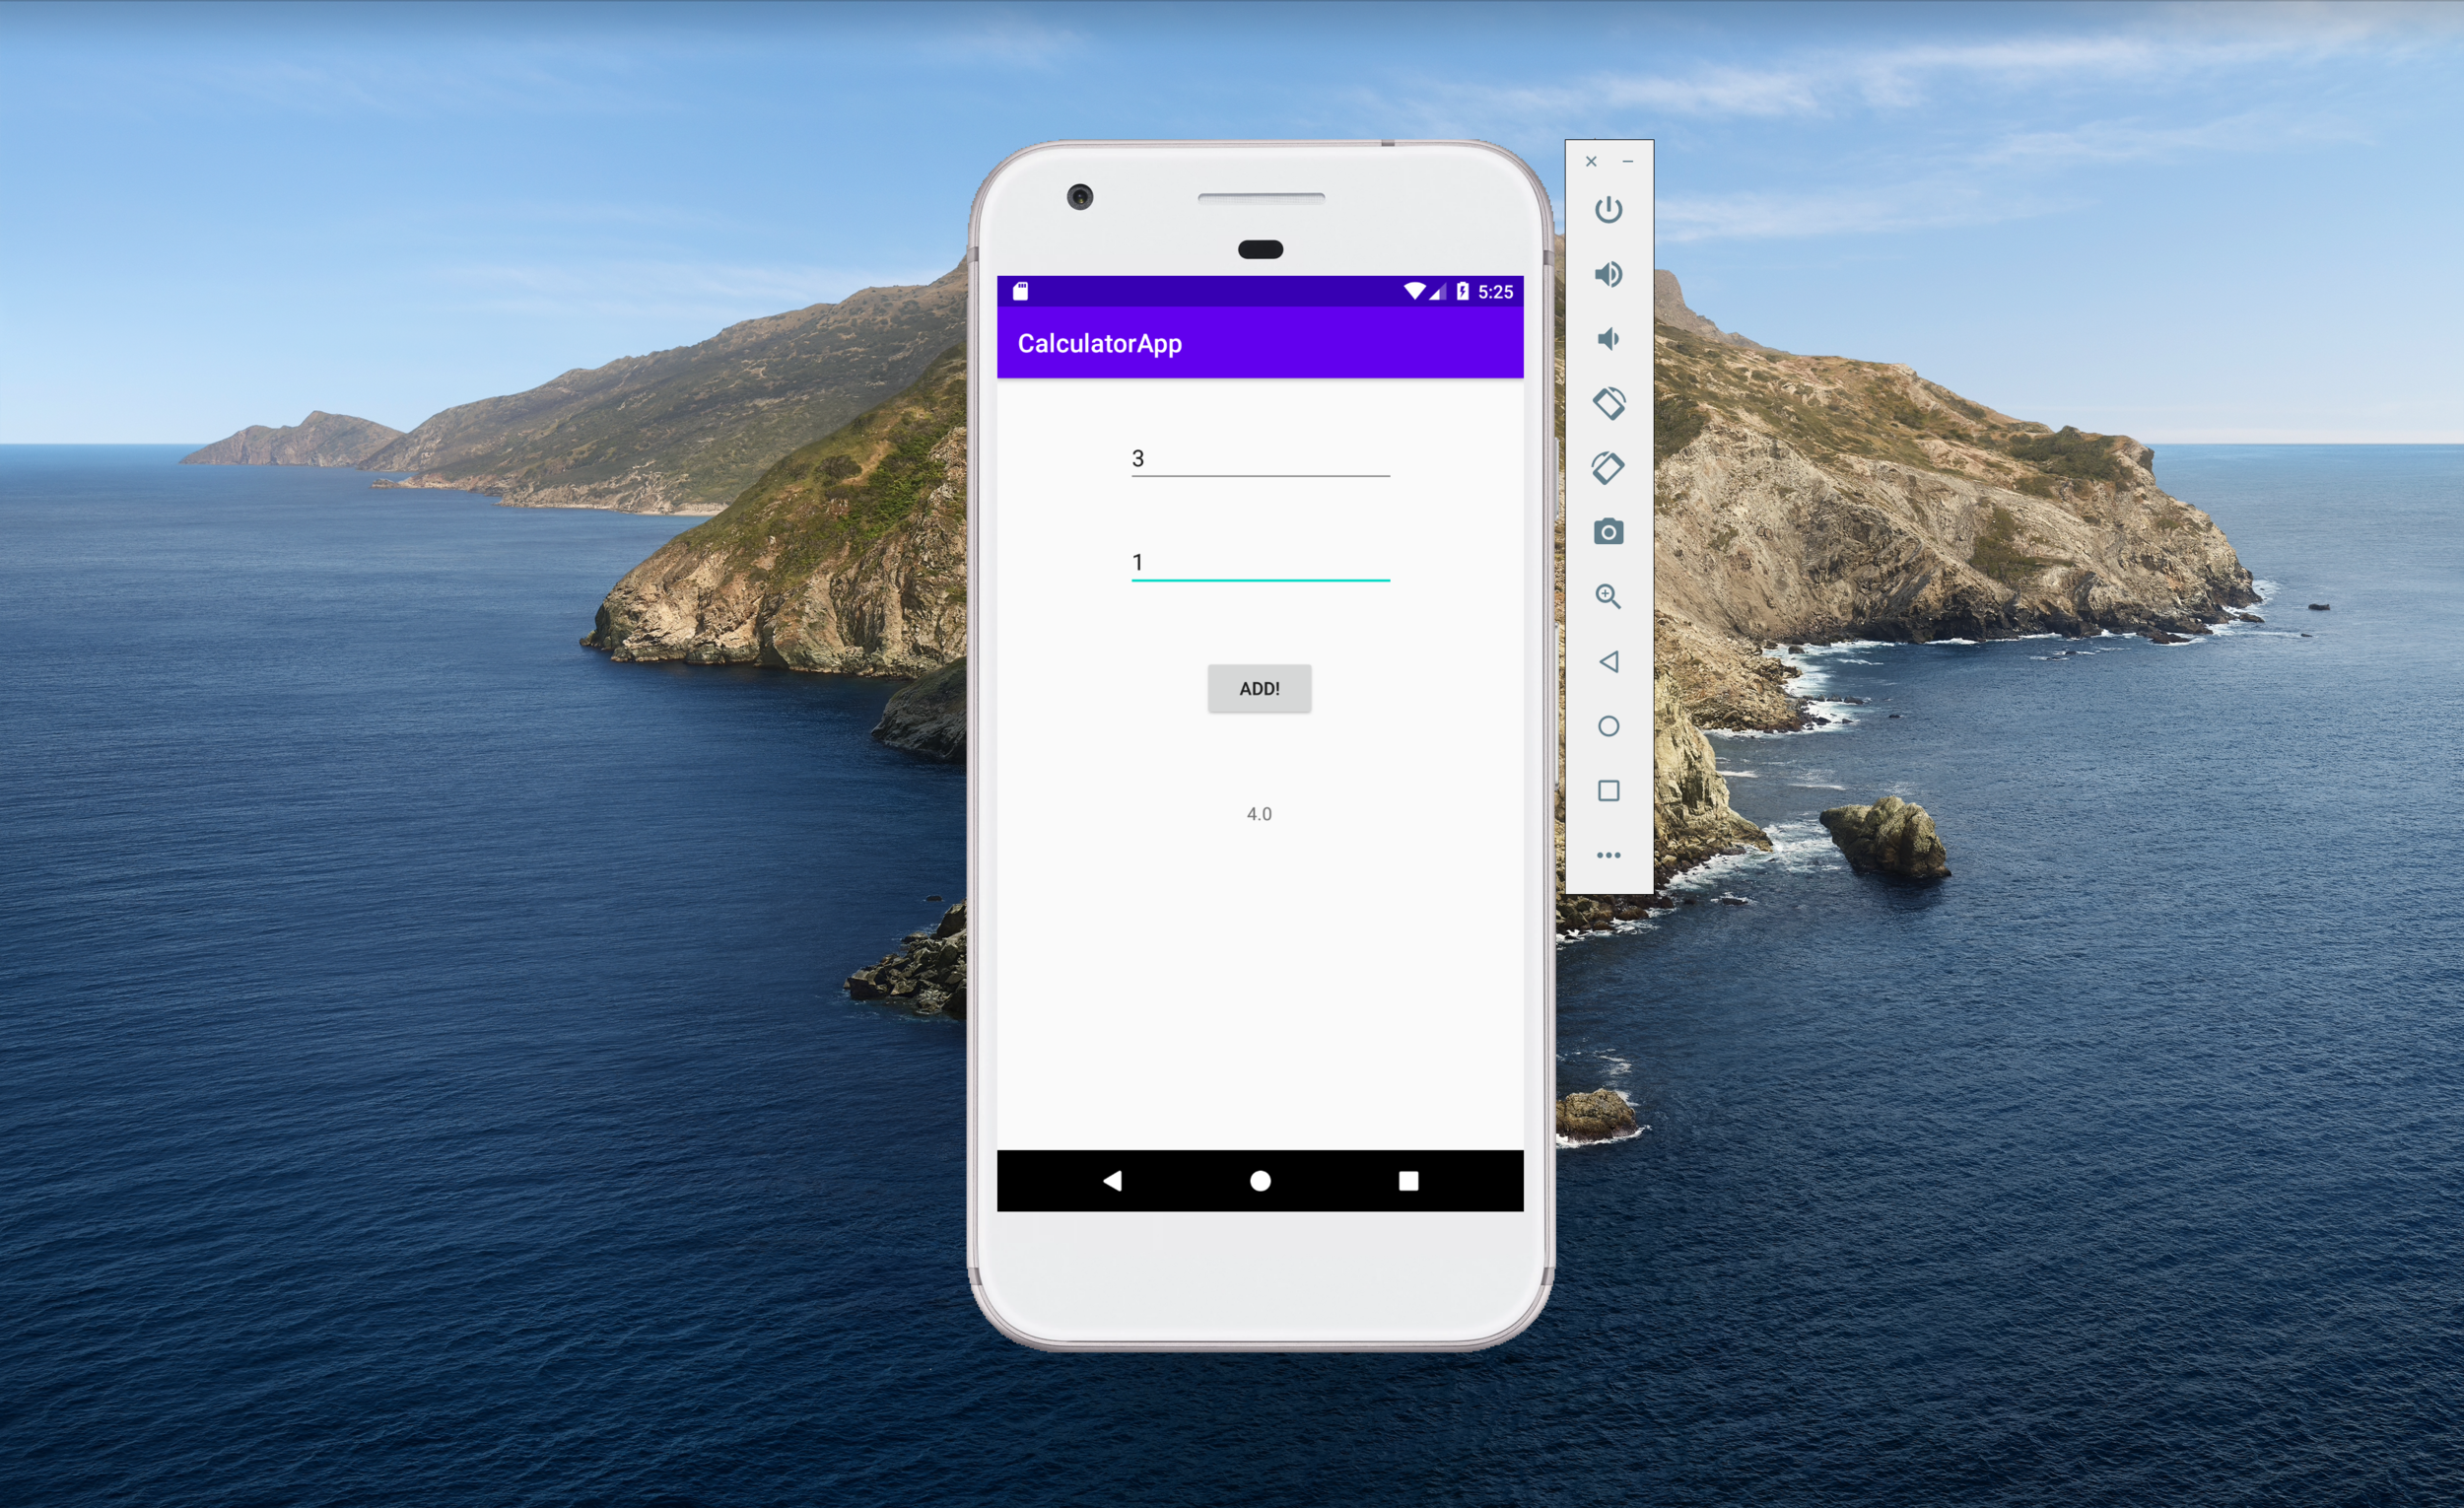
Let’s say we input 2 and 3 as the numbers, like this:

In that case, we can plug this into our function:
resultText.text = add(
    2,
    3
)
So what happens after? When you click the button, “TextView” should change to 2 + 3, which is 5.

This is what should happen when you click the button.
Awesome!
To summarize, we have the function:
addButton.setOnClickListener {
            resultText.text = add(
                    firstNumberInput.text,
                    secondNumberInput.text
            }
        }
If we translate this entire thing into English, this is what it’d be:
We declare that when the addButton is clicked, the text of resultText should turn into the addition of the contents of firstNumberInput and secondNumberInput.
In even simpler terms:
Whenever the button is clicked, we want the text to turn into the addition of the two numbers that the user put in.
Exactly what we wanted!
Step 3: Plugging it all together
One thing to note is that if you used different names for your IDs in part 2 of this tutorial, then you’ll have to replace addButton, resultText, firstNumberInput, secondNumberInput with what you named them.
Our function should go into the onCreate part of our code, because we want this whole thing to happen as soon as the screen is shown.
One thing we’ll have to add is this line at the top of our file:
import kotlinx.android.synthetic.main.activity_main.*We don’t have to worry too much about what this is, all it does is let our code know where to look to find our UI, so that it can use all those IDs that we specified when we were making our UI.
In the end, our class should look like this:

Notice the import thing we just talked about, on line 5. We can also see our add function on line 20, and the onClickListener that we deciphered before, on line 12. And that’s all we need!
Step 4: Running the app
At this point, we should be able to run the app and it should be able to calculate stuff for us. Running our app involves a bit of co-ordinating: if you have an Android phone yourself then you’ll be able to run it on there, and if not you can set up a simulator on your laptop. There is a great tutorial on how to set this up here:
https://developer.android.com/studio/run
I strongly suggest using that tutorial to run your app. When you do, you should be able to see something like this:

Great success!
Step 5: Summary
During the course of this tutorial, we have successfully:
Downloaded Android Studio
Set up a new project for ourselves
Created a UI that allows us to input two numbers and add them
Written code that adds two numbers together whenever a button is clicked
So, we’ve written a fully functional app in minimum time!

While the app should work as we want to, you might ask what the point of this whole effort is. After all, our app won’t change the world, and it’s probably not the next million-dollar idea (unless you have very good marketing people).
My first aim of writing this tutorial demystify coding a bit. I really believe that when you translate a piece of code to just pure English, it becomes so much less complicated and intimidating. My second aim was to make it possible for us to make something concrete that we can see with our own eyes, rather than some vague tutorial. With a bit of practice, it really is possible to make great things very quickly, and I hope this tutorial is a contributing factor towards the great things that you will create in the future. Thanks for reading!